Depending on factors such as type, installation skill, quality of water, regularity of preventive maintenance, usage frequency and product/brand quality, a residential water heater may last anywhere from 12 to 20 years. Experts disagree on whether traditional tank units or tankless units will last longer in general.
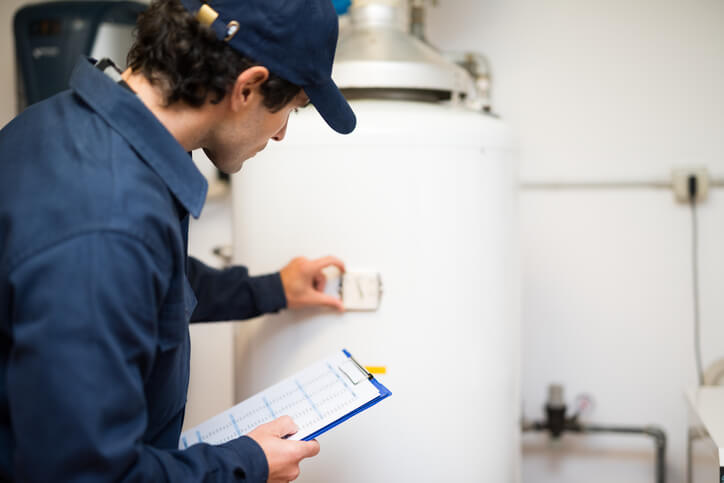
Timely water heater maintenance is a crucial step for maximizing the appliance’s life span. At the minimum, you should do a complete flush at least once per year and more frequently in a heavy-use household. Performing additional maintenance steps may ensure you get the best performance from your water heater and maximize its life span.
What Are the Benefits of Preventive Maintenance on Water Heater Equipment?
Regularly maintaining your water heater has several advantages.
Cost Savings
Depending on the type, grade, and quality of installation, a new water heater may cost anywhere from $1,000 to $4,000. Regular maintenance may lengthen the time between replacements, allowing you to keep more of your hard-earned money in your pocket. You’ll also spend less on repairs.
Improved Performance
Scale — a hard, chalky substance primarily consisting of calcium carbonate and magnesium — accumulates on the unit’s heating element over time. Scale deposits may interfere with the heating process or, through a series of events, damage piping and appliances. It might also cause the water heater to work harder, impacting its performance and longevity. An annual flush will help prevent scale formation.
Maintaining Warranty Coverage
Most water heater manufacturers offer warranties ranging from six to 12 years. However, this protection typically doesn’t include scale-related damage. Flushing your water heater to prevent scale buildup reduces the risk of voiding your warranty and experiencing a costly replacement.
Increased Energy Efficiency
A water heater consumes approximately 13.6% of a home’s energy. Only the heating system uses more. Keeping your unit running properly may lower your utility bills by minimizing costly waste.
Water Temperature Monitoring
If your home’s water is too hot or cold, it usually indicates a problem with the heater. Regular maintenance checks may detect potential temperature issues and enable a professional technician to take corrective measures if necessary. They also allow a proactive approach to preventing a major repair or a premature replacement.
Flood Prevention
Water heaters contain a pressure relief valve, a device designed to prevent thermostat malfunctions that may cause the water to exceed the tank’s pressure rating. Conducting a quick relief valve test may detect an issue that might lead to a flooded basement, closet or storage area.
Products such as flood stop valves are available to be installed that have a sensor on the floor that detects the water and shuts off the cold-water feed to the water heater device, thus preventing floods before they start. Ask your installer about flood stop valves and similar technology when planning for your water heater installation.
Emergency water heater pans are generally recommended on tank water heaters – yet another measure to avoid flooding.
Expansion tanks are installed on any water system with a tank water heater that doesn’t already have a place for expansion, or a check valve in line from a city water scenario. Expansion tanks must be tested to prove they are operating properly. If they fail, the pressure can grow high enough to release the relief valve or cause a leak in the water heater or water system. As always, routine maintenance is best for prevention!
Safety
A pressure relief valve issue or a gas leak may pose a significant safety concern for you and your family. The maintenance inspection and troubleshooting process may detect these problems before they endanger your household and cause injuries or extensive property damage.
Peace of Mind
A broken water heater is an inconvenience that prevents you from washing dishes, enjoying a hot shower or doing laundry. An annual maintenance check gives you one less thing to worry about and helps you sleep better, knowing hot water will be there when you wake up.
Water Heater Maintenance Steps
Following these tips will help keep a traditional tank water heater functioning correctly and maximize its life span.
Please note that what follows is not a “how to” guide for the homeowner; rather, it is illustrative of typical water heater maintenance steps and intended for your reference as you select a trusted home maintenance provider.
Flushing
Flushing is the process of removing sediment and minerals from inside the tank and includes these steps:
Shut down the water supply: Find the cold water valve, which is near the top of the tank in most water heater models. Move the valve to the off position to cut the water supply to the unit.
Shut the power off: If you have an electric water heater, you must turn off the power supply at the circuit box. For natural gas heaters, turn off the gas or pilot to ensure safety.
Connect a hose: Secure a standard hose to the drain valve, which resembles a water spigot, at the base of the tank. Be sure to position the drain end of the hose lower than the valve of the water heater for a gravity drain. If your water heater is in a basement, point the other end of the hose at a drain on the floor. If you don’t have access to a drain, you may need to direct the hose through a window and possibly use a pump to generate water flow.
Turn on the cold water valve: Sediment and scale typically accumulate at the bottom of a water heater tank. Fully turning the unit’s cold water valve will mix the debris and help it drain through the garden hose and prevent it from clogging the drain valve.
Run the tap: Go to a floor in your home above the water heater and open a hot water tap to create pressure that forces water out of the tank.
Open the drain valve: Turn on the tank’s drain valve and allow the water to run out of the garden hose. It should take from 30 to 60 minutes for the tank to drain completely.
Open and close the drain valve: Turn the drain valve off and on three times to eliminate the sediment stuck in the valve.
Repeat: Depending on how much sediment has accumulated inside your water heater, you may need to repeat the process multiple times until you see clear water coming from the garden hose. Keep the hot water tap open to allow gravity draining and stop it from being air locked.
Close the drain: When you finally see clear water running from the hose, close the drain valve carefully. Don’t try to force the closure, as this could break the valve.
Fill the tank: Refill the tank with water by turning on the cold water valve at the top. You’ll know the tank is full when you see water flowing from the open hot water tap with no air spurting out. Turn the tap off when this occurs.
Turn on the power supply: If you have an electric water heater, turn the power back on at the circuit box. For a gas heater, return the valve to the on position.
Check for leaks: Inspect the drain valve at the bottom of the tank for signs of leakage. If you detect a leak, open and close the valve several times to clear sediment that may be blocking the drain. You should notice that it is beginning to drain out as you execute this step. You can purchase a drain cap and washer and cap it off.
Some recommend replacing the anode rod, which is a sacrificial metal to save the tank. They are originally ½” magnesium rods, but they can cause a sulfur odor in the water. It’s possible to use an aluminum one, and they do offer thicker ones that will last longer.
Flushing Process for Tankless Water Heaters
Although a tankless water heater does not have a tank, the system may still accumulate scale that requires removal via flushing. The steps in the process include:
Turn off the power: Shut off the gas or electricity supply and remove the unit’s access panel or cover.
Connect a hose: Hook up a garden hose to the water heater’s inlet side where cold water enters the system. If the unit doesn’t have a separate hose connection, you may need to remove the existing cold-water supply hose. A double ended washing machine hose can help depending on the connection to the sump pump. Remove the hot water connection or run a hose from it to the bucket with the sump pump.
Connect the sump pump: Attach a small 1/6 horsepower sump pump to the other end of the hose and submerge it in a 5-gallon bucket containing 3 gallons of white distilled vinegar.
Turn on the pump: Run the sump pump for approximately one hour to circulate the vinegar through the water heater’s piping system in a continuous loop. After an hour, replace the vinegar with fresh water and run it through the system to remove any remaining vinegar and sediment.
Completion and restart: After completing the process, turn off the sump pump, close the valves and re-attach the tankless water heater’s hoses. Follow the manufacturer’s instructions for restarting the unit.
Additional Water Heater Maintenance Steps
While regularly flushing is the most important hot water heater preventive maintenance task, there are other actions you could take to ensure maximum equipment performance:
Temperature adjustment: Maintaining a water temperature of 120 degrees to 140 degrees Fahrenheit is sufficient for hot water-related household activities and will reduce the risk of burning or scalding. It will also prevent the buildup of harmful bacteria that could enter your water supply. Adjusting the thermostat enables you to raise or lower the temperature if needed.
Sacrificial anode inspection: Anode rods located inside the water heater protect the tank against corrosion. When you do the flushing, check the condition of the rod to ensure it hasn’t corroded.
Leak and drip repair: Small leaks or drips around the base of a water heater often indicate water supply connection issues. Check for loose fittings and tighten or replace them if needed.
Contact Tuckey for Hot Water Heater Preventive Maintenance
If you live in South Central Pennsylvania and need help with water heater maintenance, the professional plumbers at Tuckey Mechanical Services, Inc. are ready to assist you. We’re a local, family-owned business you can trust to take the time to do the job right. Our services also allow you to avoid the hassle of do-it-yourself household maintenance with professional, efficient and honest work.
We proudly serve homeowners in these cities and areas: